
The New Provider Suite:
Educational Providers, we have great news for you! We’ve updated our provider accounts and will introduce you to them here and now. We are currently in the BETA phase with only a few providers using the system, but we plan to have every provider using the new system in the future! We know change can be scary sometimes, so we want to make sure you know what to expect when the time comes.
The Dashboard: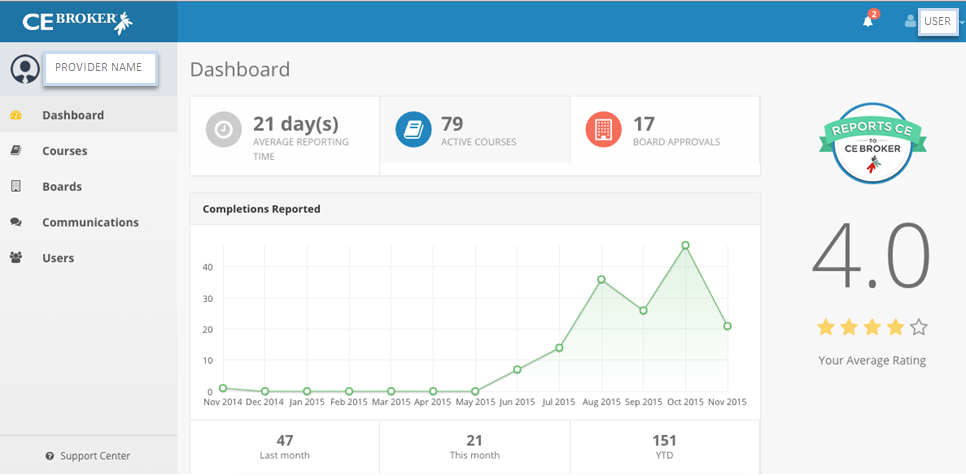
This is the screen you will see when you first log in, and it will be your home base where you will access many familiar features and some new ones! On the left-hand side of the screen, you will see a menu with the following tabs: Dashboard (your current screen), Courses, Boards, Communications, and Users (this last tab will only display if you are an Admin. user on the account).
On the Dashboard, you’ll see some key metrics to help you understand your activity at a glance. At the top-middle, there are three boxes: one that corresponds to your average reporting time, a second that displays your total number of active courses, and a third that indicates the number of Board approvals you hold. Additionally, you will see a snapshot of your average rating on the right-hand side, calculated based on reviews from licensees who have completed your courses. The graph in the middle will display the number of course completion reports you’ve made on a monthly basis for the last year, while your year-to-date total will display numerically below the chart. In addition, you will see the number of reports you have made in the current and immediately preceding months.
The Courses Tab:
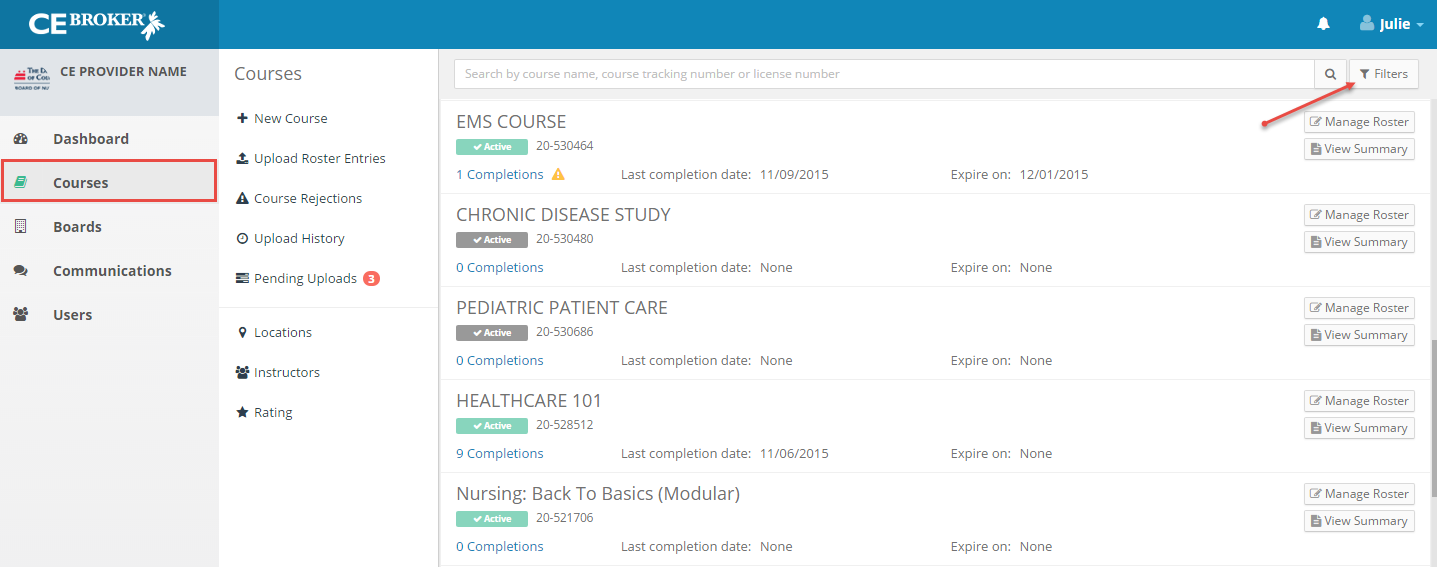
When you click on the Courses tab from your menu on the left, you will be brought to a master list of all your courses, including “In Progress,” “Pending,” and “Active” courses. Here, you can filter by course type, course status, location, and/or instructor using the “Filters” button at the top right of your course list. Please note there is also a search bar at the top that may be helpful; you may use this to search by course name or course tracking number, and you can even search by license number! Searching by license number will allow you to see all the courses you have reported for a particular licensee at one time on one list.
There is a sub-list of options to the left of your course list. You can add a new course, upload roster entries using excel or text files, view rejections, and review a history of your uploads, including a date and time stamp and a link to the license numbers you included in each posting. You will also have the opportunity to review, modify, and remove any pending uploads, so tracking the upload process for accuracy will be easier than ever!
You may notice you have some new course status indicators, and these tags will show up under each course title on your course list. We have color-coded them to make them easy to identify. The green “Active” tab indicates that all hours on the course have an approved status, while the grey “Active” tab means that at least one Board has approved hours, while at least one other Board request for hours is pending, withdrawn, or expired. The blue “Pending” tab indicates that all applications for approved hours are awaiting Board decisions, and the yellow “In Progress” tab indicates that the course application was saved mid-process as a draft. These “In Progress” applications can be resumed or deleted at any time for your convenience (buttons for either resuming or deleting will be to the right of these “In Progress” courses).
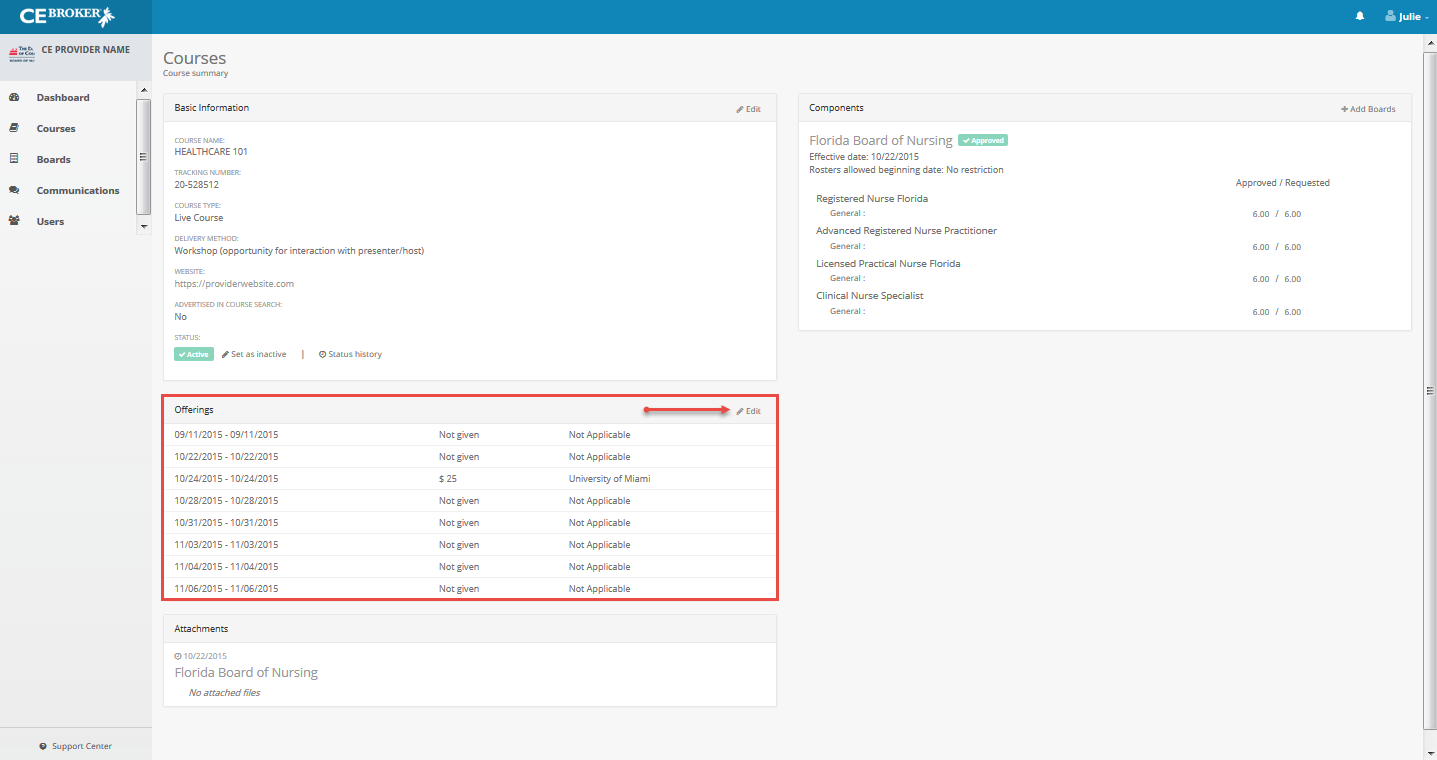
You will see two buttons to the right of each active course as well: “View Summary” and “Manage Roster.” The course summary (pictured below) will show you basic course details, offering information, application attachments, approved hour information, instructor details (as applicable), and any answers you provided to Board questions during your application process. Click “Edit” next to Basic Information to modify your course description, the registration website, or the advertising settings.
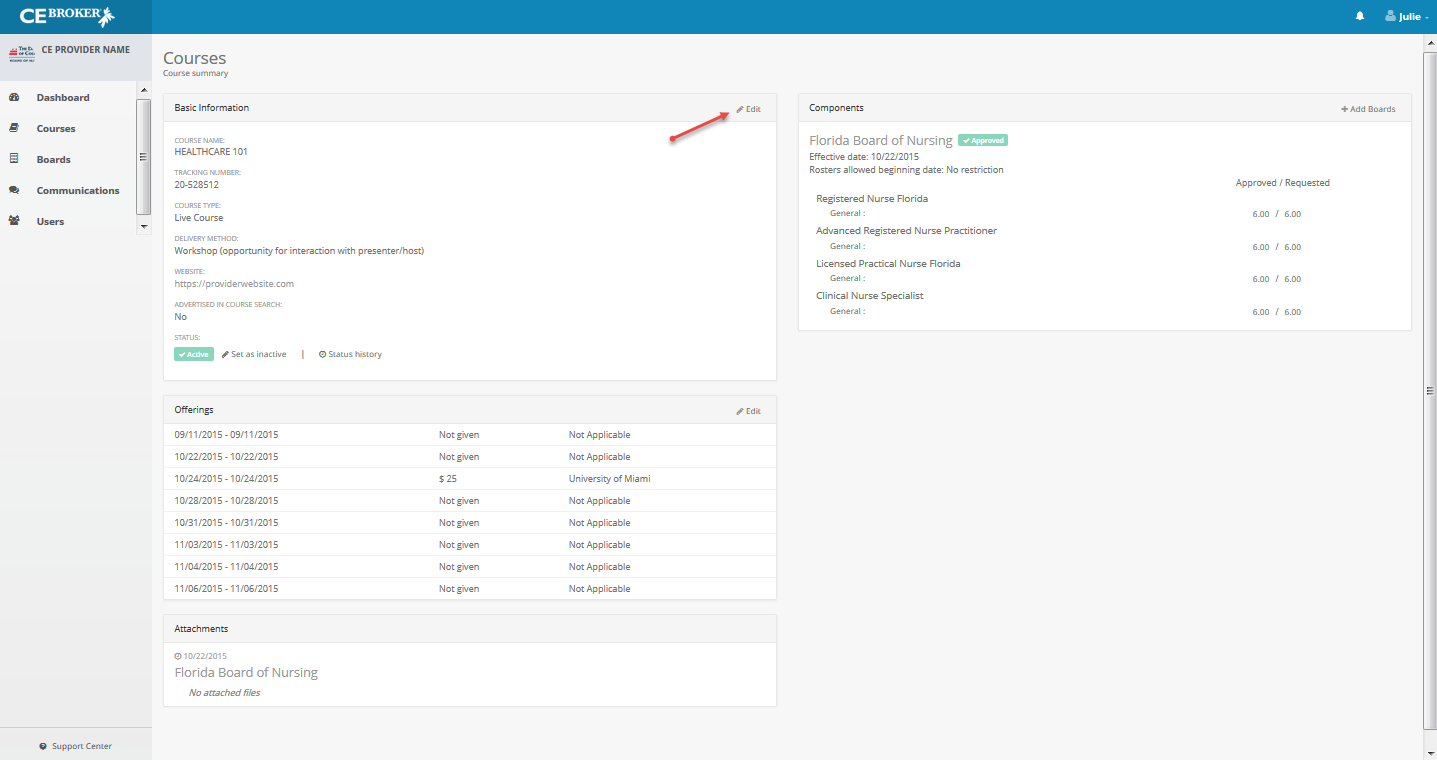
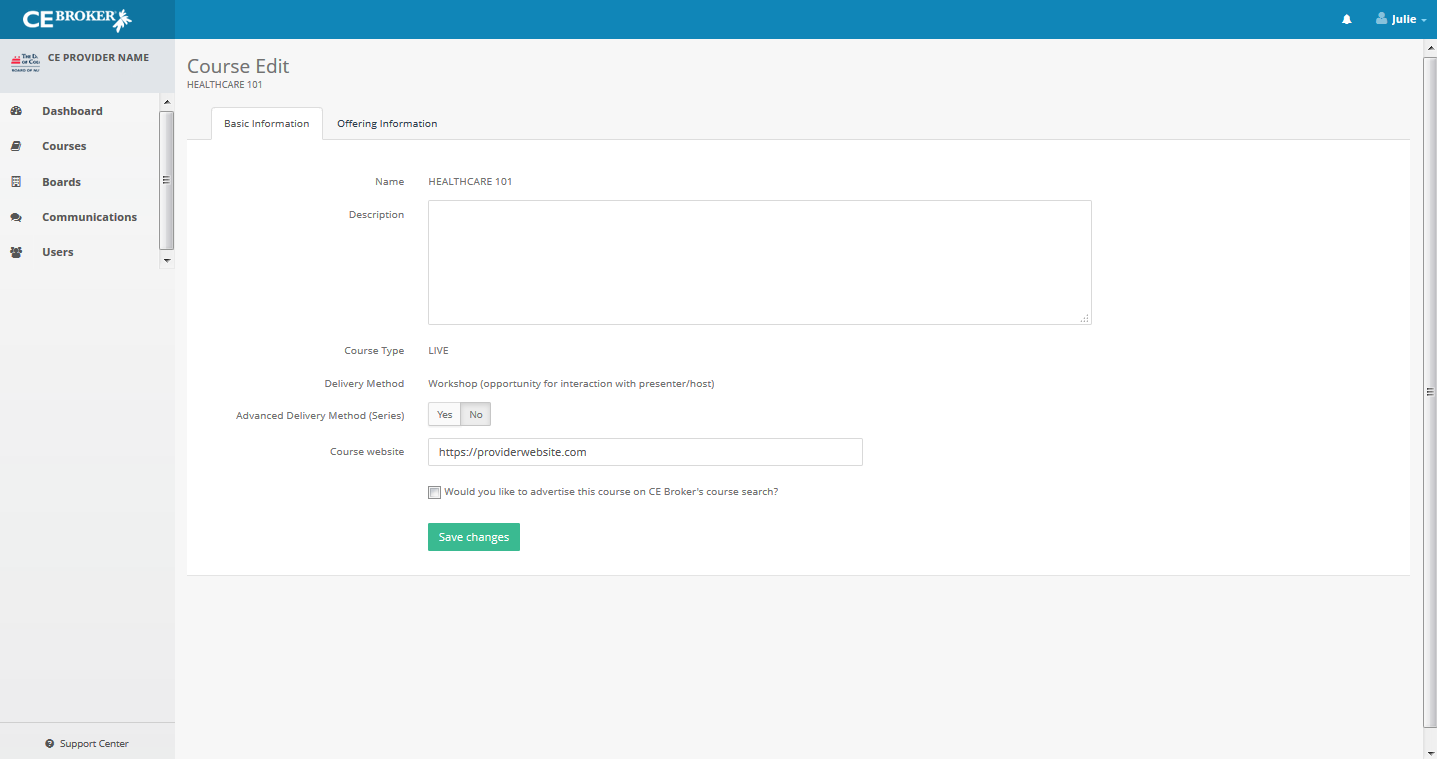
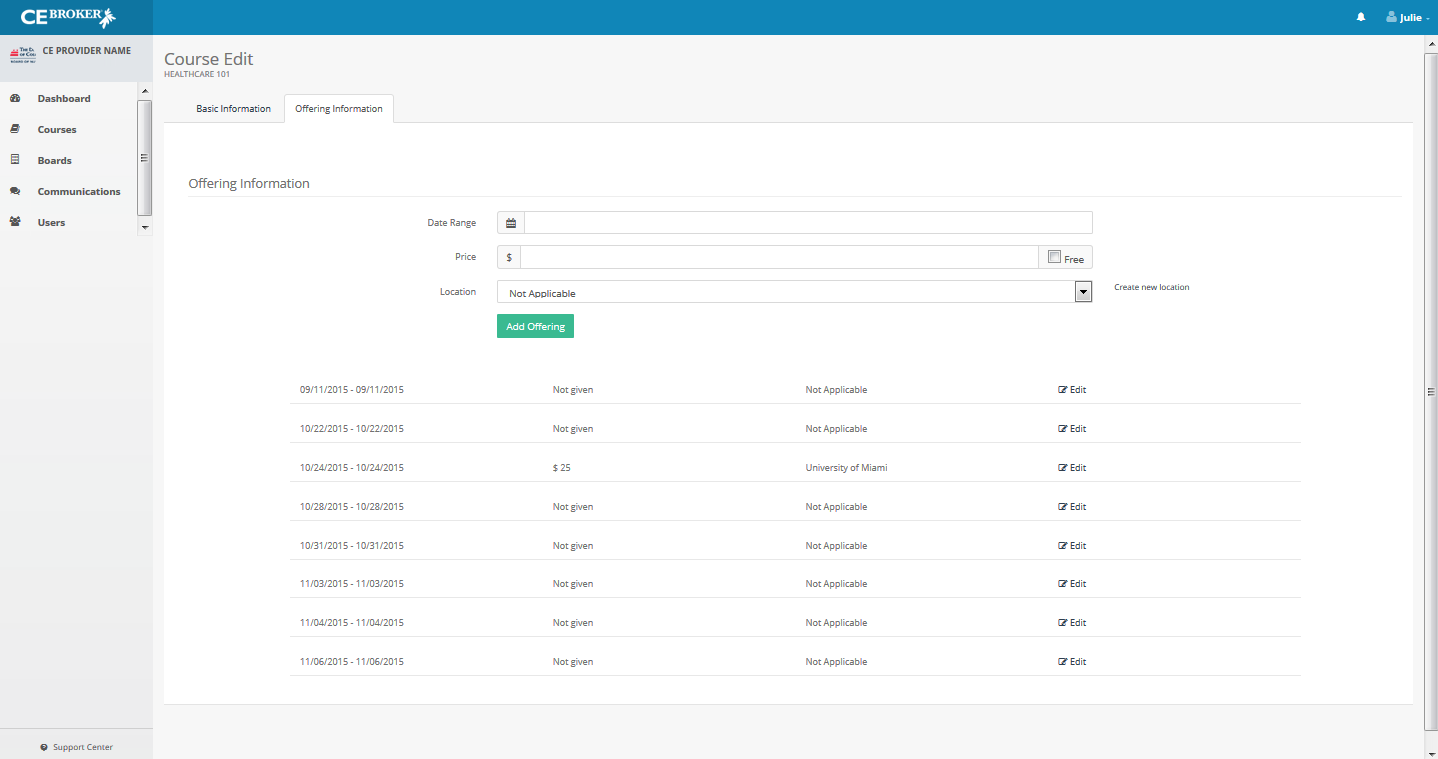
With the old provider account, the steps from adding a course to posting a roster were more complex. You are certainly accustomed to creating a course, establishing publishing to advertise, and adding roster entries. One of the most exciting changes in the new Provider Suite is that publishings are a thing of the past! Instead, you will now have offerings that allow you to tell our system and the public, via our course search, what dates you will offer your live activities and where. However, that is all the offering is used for—it is no longer necessary in order to post a roster. Click “Edit” next to Offerings to add a new offering or to modify your existing ones, including changing the dates, locations, and prices of each.
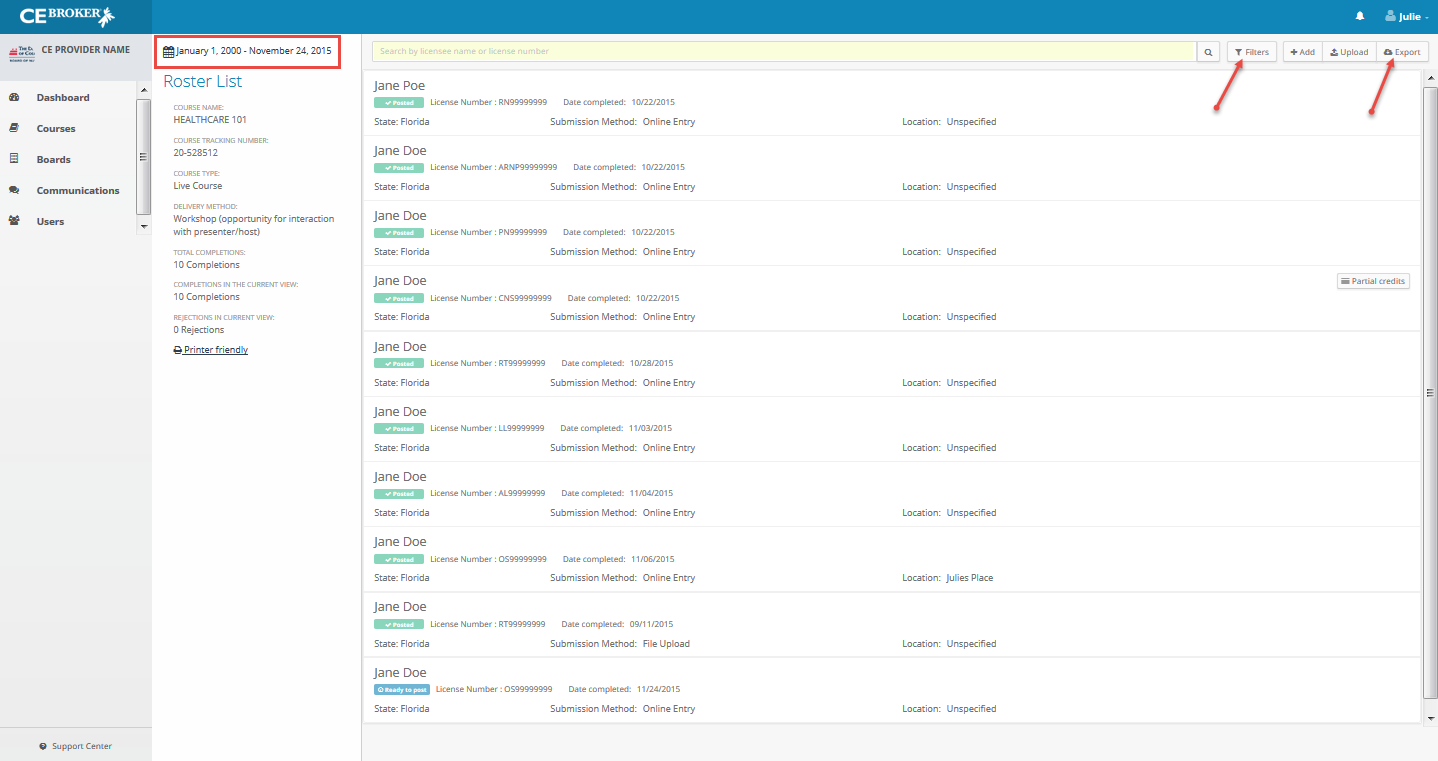
To understand more about how that process works, you should go back to your full course list. Each course now has its own single “course roster,” which contains all entries for that course, much like you are used to for any time/home study courses now. Click on the “Manage Roster” button to see that master list. You can filter your roster by date range if you would like to see a specific time frame, by the state in which the attendees are licensed, by the status of the roster entry (Ready to Post, Posted, Rejected), by the location associated with certain attendees, or you can use the search bar to look for a particular licensee by name or license number. Additionally, you can export the roster to an Excel spreadsheet using the Export button at the top right of the screen. Click here to read more about how to report manually by license number, or click here for information on the new Excel/Text file upload process in Provider Suite.
Boards Tab:
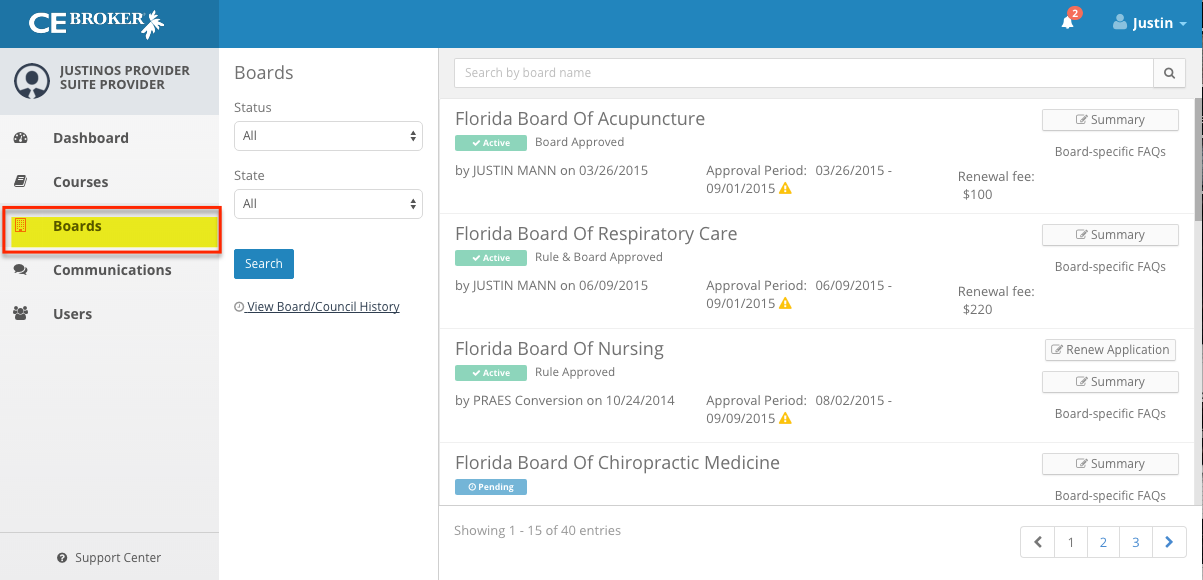
From here, you will see a master list of all possible boards. You can sort the list to view only active boards, boards you have not applied for, in-progress applications, etc. This section is color-coded so you can see at a glance what status your board application holds. The green “Active” means that you are approved for that board. The blue “Pending” tab indicates that you have submitted your application and are awaiting approval. The yellow “In Progress” tab means that you have not yet submitted your application and must complete it for the board to review. On the left-hand side of the screen, you can sort for boards by “status” or by “state.”
Communications Tab:
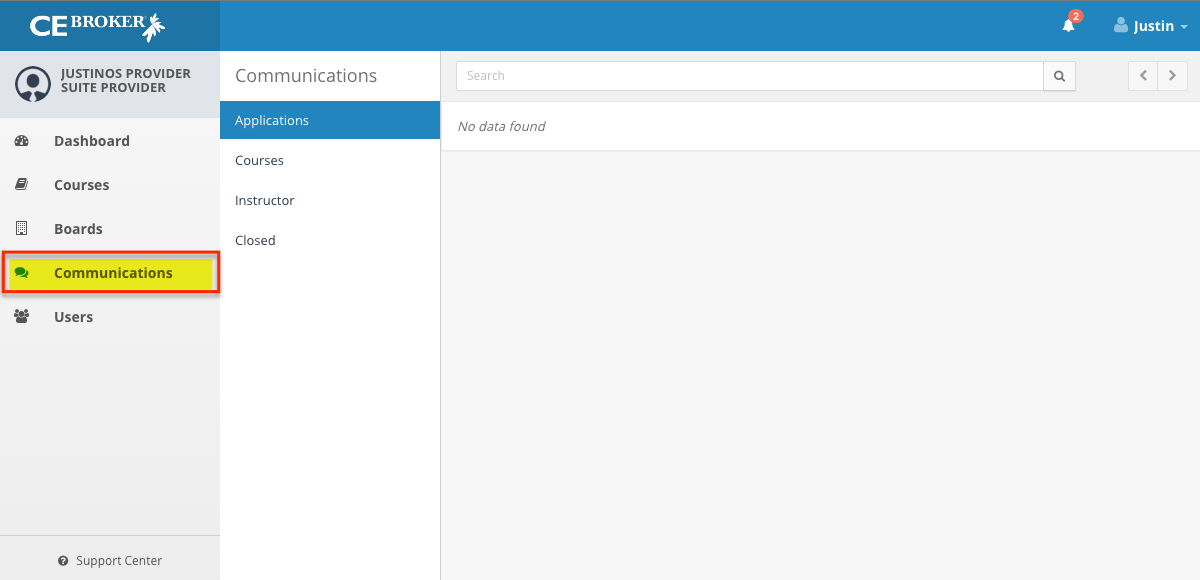
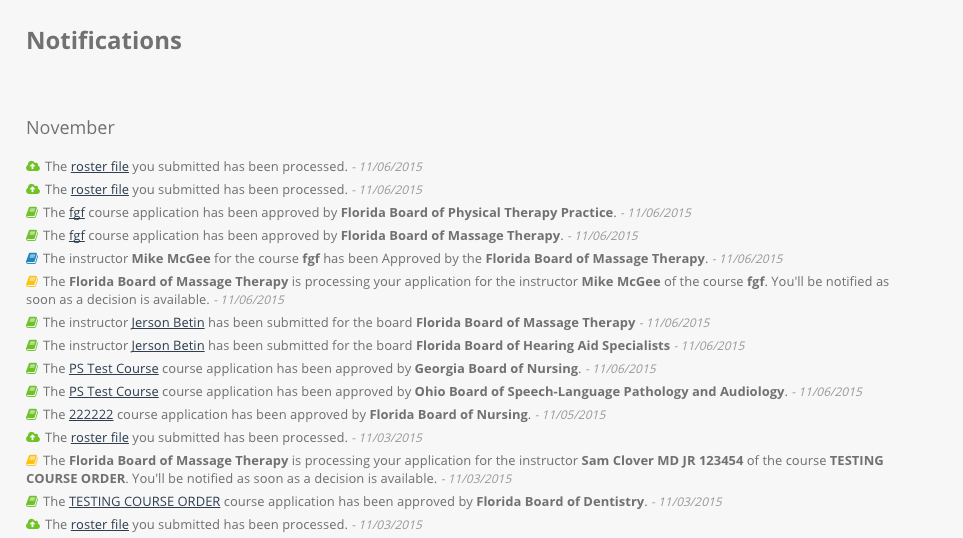
The Communications tab is for communication from the board regarding pending applications. All other things you were used to seeing in your message inbox will appear under the bell icon at the top right-hand of the screen, leading you to your Notifications page (see below).
Users Tab:
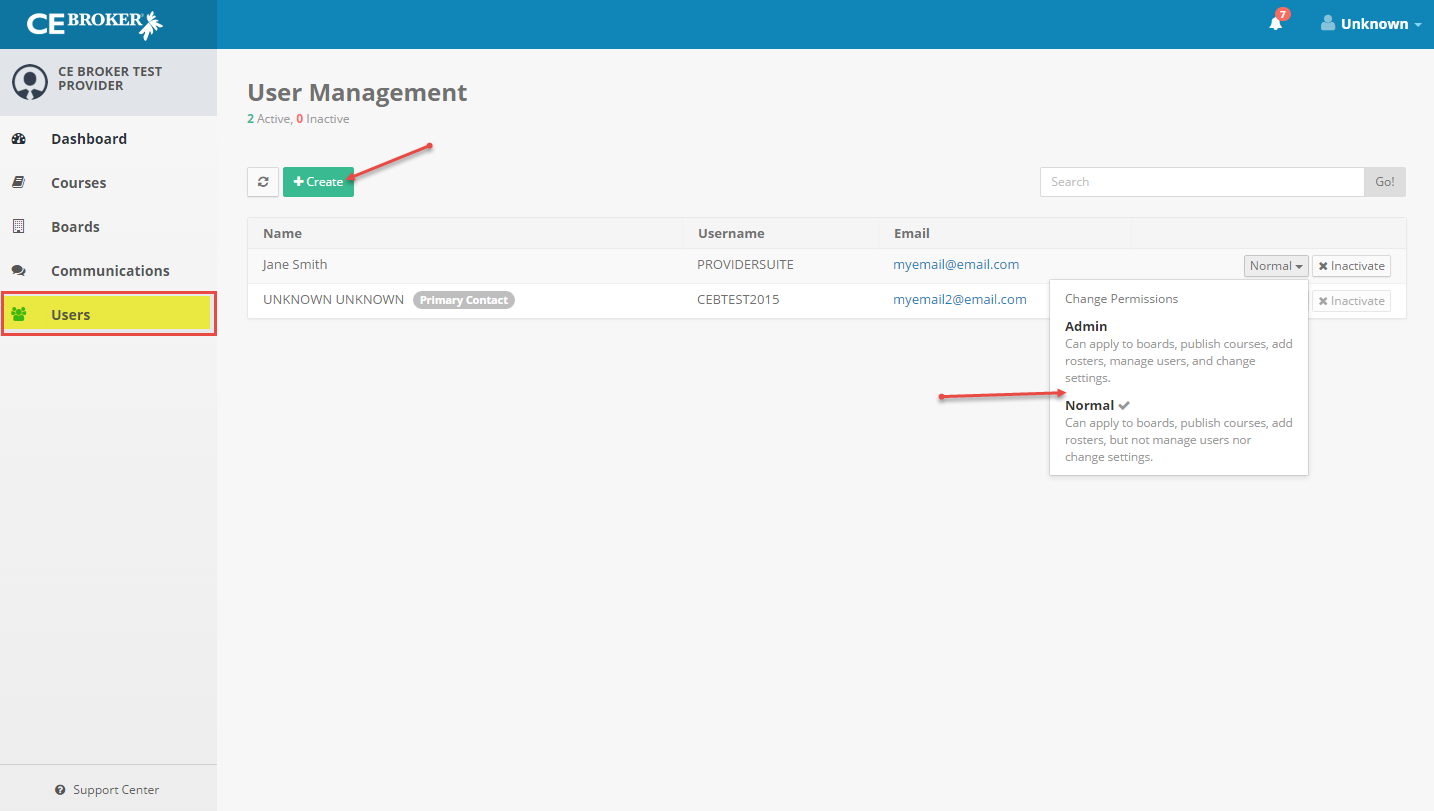
There are two types of users in the new Provider Suite: “Normal” and “Admin.” “Normal” users can perform all functions except for managing users and changing provider-wide settings, while “Admin” users can do everything! Adding a new user has also been simplified– an email will be sent to the individual you wish to add, inviting them to create their own profile. Once complete, they can begin to access the provider account immediately. You can learn more about how to add, remove, and modify users by clicking here.
Of course, if you have any questions about any of these changes or how to use the new site, there are many resources for you to utilize. At the bottom left of the screen is an option to view the FAQs we’ve made for the new Provider Suite. And you can reach out to our CE Experts anytime M-F, 8am-8pm (EST) at 877-434-6323.
We’re excited about this upgrade, and we hope it enhances your experience with CE Broker!